Art Journal
Nature Ramblings ~ Past Times Time Travel ~ Romancing Daily Life
Showing posts with label sewist. Show all posts
Sunday, January 31, 2016
Journal Notes- Downton Abbey - Positive Ending Note
Labels:
BBC,
CA,
California,
create,
Downton Abbey,
end,
farewell,
hats,
Laurel Shimer,
millinery,
PBS,
sew,
sewing,
sewist,
story,
story telling
Friday, January 29, 2016
Ench By Sew-40: Year of Monkey Inspires Sewing
Click on this link in iTunes to download the 40th episode of the Enchanted by Sewing Audio Podcast, recorded in January of 2016. Or listen directly on the web by clicking on this link.
Kunghei fatchoy!*
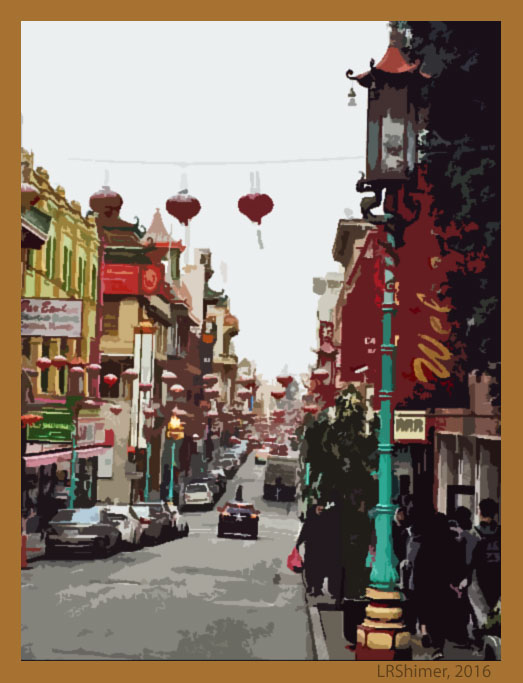
The Celebration of the Year of the Monkey begins just a little over a week from now. This month’s “Enchanted by Sewing” show celebrates sewing inspired by the Chinese Lunar New Year
This episode:
Primero /First - A brief introduction to the Chinese Lunar New Year
http://www.sftourismtips.com/chinese-new-year-san-francisco.html
http://www.telegraph.co.uk/news/worldnews/asia/china/12125631/Chinese-New-Year-2016-The-Year-of-the-Monkey-Everything-you-need-to-know.html
Entonces/Then: My audio notes from the show “China through the Looking Glass” a very popular textile and fashion show that ran last summer 2015, at the Metropolitan Museum of Art in New York City
Y Tambien/And Also: I include reflections on my own experiences with Chinese inspired patterns, textiles and fashions.
https://en.wikipedia.org/wiki/Cheongsam
. . .
The American mid 20’th century musical “The Flower Drum Song” is a great way to get a sense of Euro-American people’s awareness of Chinese –descent communities in their midst.
Chinese fabrics and styles, whether from history, stories, films or a growing awareness of Chinese culture, have inspired elements in my sewing, since before I first put a needle into a piece of material.
Remembering where my inspiration to create and sew comes from, is just one more thing that keeps me…
Enchanted by Sewing
*In Cantonese “Happy New Year” is “Kunghei fatchoy “ (/gong-hey faa-chwhy/)
Labels:
CA,
China,
China Through the Looking Glass,
Chinoiserie,
fashion,
History,
inspiration,
Metropoliton Museum of Art,
New York,
sew,
sewing,
sewist
Saturday, January 9, 2016
Embellishment Inspiration: Personable Lions - Antique Printed Fabric
I think this design would make a charming modern fabric. A quilt for a child? Definitely! But also I can imagine borrowing this pattern for patch pockets, tote bags, or miniaturized for a border print on a skirt hem or shirt cuffs.
Web Resources: Fashion and Virtue
Textile Patterns and the Print Revolution, 1520–1620
Thursday, December 31, 2015
Plaid Tidings: My Husbands New Nightshirt (M8379)
In my November and December podcasts, the theme was plaids and tartans.
I'm in the mood to sew more than one this winter season. Hope I can make that happen
My husband's nightshirts were wearing out - he usually needs one or two new ones about every two years. Since the last ones I made him, I've misplaced the pattern. I found McCalls 8379 on the web. It seems to be out of print, but there are probably still many available the same way I found this one. I liked the front tuck and simple neckline.
I got the side seam plaids matched, but since I quilted the pocket, the flannel in the pocket tightened up quite a lot more than the flannel in the front of the garment. So the plaids didn't match up when I laid the pocket down. My husband doesn't care! He's glad to have a place to put his iPod or reading glasses when he's hanging out on a Sunday morning reading the paper.
![]() |
| He likes it! |
Friday, December 18, 2015
Ench By Sew-39: Plaid tidings’ to you and all of your kin! Part 2 of Tartans and Plaids (Winter Holidays Mini-Cast)
![]() |
| Newly togged out Katie Rose is an Engel-Puppen doll |
Plaid tidings’ to you and all of your kin! During the winter holidays, plaids and tartans look so festive. Dolls are the perfect plaid-sewing partners, because sewing for a doll, gives me the motivation to engage in some sample sewing. And at this time of year they remind me of dollies, and doll clothes that were sewn for me, at this special time of year – like the mini wardrobe of Barbie clothes my aunt gracie sewed and sent me one winter holiday, as well as the red courderoy jumpers and dotted slip dresses, Mama made for our Chatty Kathy dolls, as well as for me and my sister Trisha in the winter I was 4 (with matching girl jumpers).
![]() |
| K.R's green plaid jumper is based on an American Girl free doll clothes pattern in "Mollie's Pretty Clothes" |
The doll featured in this sewing project is Katie Rose. K.Rose is an Engel-Puppen doll. (Engel-Puppen doll link - has history of these dolls)
Sample sewing may not sound very exciting, but sewing an 18” (think American Girl sized) plaid doll’s dress gave me a chance to – in a very limited amount of time - practice my pattern cutting out skills for plaid fabric, as well as experiment with a new-to-me technique for improved plaid matching
This show is all about technicos/techniques.
My goals with this doll’s dress were to work on:
Primero/First)Careful layout of multiple princess-seamed bodice pieces - definitely less nerve racking for a doll, and gives me confidence to work on the red plaid princess-seamed shirt I’m muslin’ing - as well as the plaid nightshirt I’ll plan to be making soon for my husband.
Entonces/Then)I tried Fusible Thread to decrease slippage during sewing (a new-to-me technique for enhanced/ improved plaid matching). Also useful /good idea for sewing on patch pockets
I used crafster to look for help regarding my challenges with fusible thread.
Response from ~T Read more: http://www.craftster.org/forum/index.php?topic=442125.0#ixzz3ufLODkuJ
https://www.byannie.com/shop/product/fusible-thread/
“She calls for low heat, so I am guessing you just had the iron too hot.
She also describes another technique for using it with aluminum foil as your pressing cloth..letting that cool and peeling it off, to create a design on fabric. Like a dimensional paint overlay technique?
You Craftsters always inspire me to hunt for new ideas
I Goggled 'Fusible Thread Instruction' for this one. There are more on there as well.
~T”
| I love using succulents all over the house during the festive season. This simple arrangement provides the perfect place for Katie Rose to hang out. |
American Girl Doll Clothes Patterns - Free http://www.agplaythings.com/AG%20Patterns/DollDressPatterns.html
More Plaid Web Resources
http://moviestarmakeover.com/category/classically-ladylike/
http://moviestarmakeover.com/category/myrna-loy/
http://www.pendleton-usa.com/thumbnail/Home/FABRIC/PLAIDS/1721/c/1828/pc/1816.uts
Labels:
American Girl,
CA,
California,
Doll,
plaid,
sample,
sew,
sewing,
sewist,
tartan,
technicos,
technique
Thursday, December 10, 2015
Goof! Plaids and How NOT to Match 'Em!
| Hand basted the seams with fusible thread. All nicely lined up! |
| You can see the stitches, because not yet fused |
There must be a secret to the actual fusing, because all that happened was, that when I pressed the basted seams, the thread fused onto one of the seam lines, and disappeared from the other. I would have been better off, simply basting with regular thread, before doing my machine stitching.
| My lovely fusible basting thread melted into the fabric, but didn't meld the seams! |
Onward and upward. This is the reason we do sample sewing!
Posted in Crafter.... http://www.craftster.org/forum/index.php?board=391.0
Sunday, November 29, 2015
Pattern Work - Working For My Plaid - M6076 Princess Seamed - With Sleeves
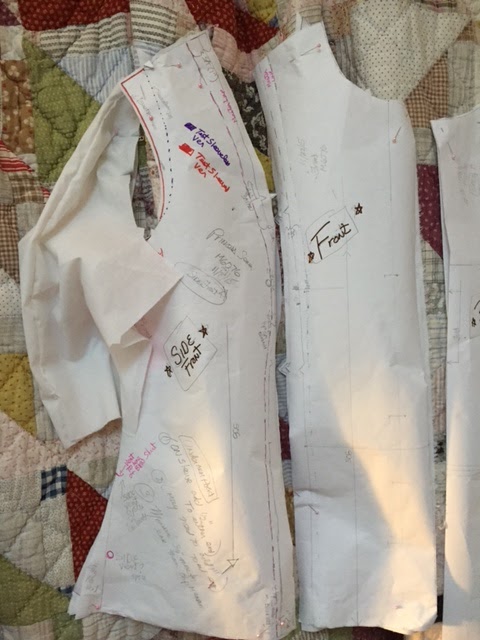
| Can't you just envision these pattern pieces and muslins as a red-plaid princess-seamed shirt? |
All four pattern pieces have a muslin attached. My next step is to transfer the seam lines onto the muslin, before I begin basting.
I drew those seam lines onto the pattern, based on the measurements I took from the sleeveless Western Winds shirt, which I created from this same pattern (altering to create a sleeved version as well as getting a good fit for me). I've really enjoyed wearing Western Winds and got quite a lot of late summer/early fall use out of that shirt - of course here in California it stays warm longer than much of the U.S.
For Western Winds, I cut back the top of the shoulder towards the neck, but I've dropped that back in place for this sleeved version. My new pattern includes lines for both sleeved and sleeveless versions. I cut with room for either version, then use my clover wheel to lay down the armscye lines, then cut away what I don't need for the particular version I'm making.
For more description, see my previous post- Sleeved to Sleeveless.
There's a good chance I'll be making a few more changes to the muslin, and therefore pattern, before I snip into that red plaid. I also plan to re-test the new pattern on another sleeveless version, sometime over the next few months. Tried and true patterns take a while to get just so, but they sure are worth their weight in gold.
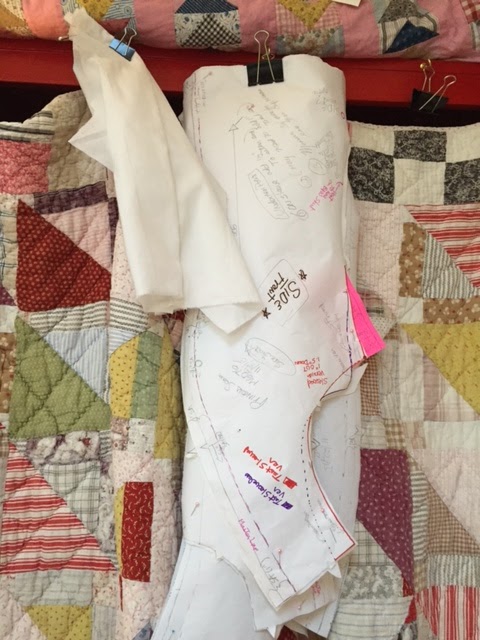
| I store in-progress muslins and pattern pieces clipped onto binder clips hanging off cup hooks. That way they don't get wrinkles in between sewing sessions, and they all stay together. |
Labels:
CA,
California,
enchanted by sewing podcast,
fit,
in-progress,
Laurel Shimer,
M6076,
muslin,
pattern work,
princess seam,
sew,
sewing,
sewist,
shirt,
slater,
sleeveless,
store,
tried and true,
west
Tuesday, November 24, 2015
Monday, November 16, 2015
Ench By Sew-38: Tartans and Plaids
Direct Download - Click on this link OR Click on this link in iTunes
![]() |
| Myrna Loy begarbed in plaid - "The Thin Man" |
BTW if you know anybody looking for the perfect pooch, I’d highly recommend the group where we found Jasper.
They’re called Tiramisou Dog Rescue and they foster dogs all over – even in other countries.
Administrator Lou (tiramisudogrescue@gmail.com ) was really great about reading my list of needs for the right dog for us and suggesting dogs for me to check out. (Those needs included not hassling our ancient little blind dog, not chasing kitties, and being super affectionate – all of which she found for us in Jasper).
https://www.facebook.com/tiramisudogrescue
tiramisudogrescue@gmail.com
In this month’s show
* Primero (First): Tartans and Plaids – What’s the difference?* Entonces (Then): Tartans – Who’s got the rights to wear them? A Famous Historical Myth
Delightful Historical Fiction - DIANA GABALDON Time Travel Adventures- A Wonderful fast paced historical series, for plaid-loving romantics. Claire travels unexpectedly back to the time of the Jacobite rising in the highlands of Scotland and finds a place for herself that suits her even better than her life in post war Britain. Meeting a gentle, handsome and funny over six foot highland Scot doesn't hurt.
* Y Tambien (And Also): A Visit to the Edinburgh Tartan Weaving Mill – recorded on my trip to the U.K. early this last summer
* Pensamiientos Finales (Final Thoughts): Why I love plaid
NEXT MONTH – Technicos for - Tartan and Plaid Matching - It's not only about how you lay out your pattern
~ ~ ~
Web Resources: https://www.pinterest.com/lrshimer/plaid-and-tartan/Monday, November 9, 2015
Dogs! Good Excuse for Sewing Slow and Green (Scraps, Green Sewing)
![]() |
| Completing a pillow cover from dressmaking scraps is a real sewing accomplishment with the world's cutest dog around the house! |
Jasper
Yes - He adopted us four weeks ago
A great save-the-worlds-dogs organization - Lou was so helpful locating the right pooch for our household https://www.facebook.com/tiramisudogrescue/
About a year and a third old
Some kind of mix - maybe Australian Shepherd, Golden Retriever, and something with a curly tail
Oh Lordy, he is the sweetest dog I've ever known!
Yes, it is like having a new child in the house
Three-four walks a day - minimum
Haven't encountered a dog he doesn't like yet
Yes, Dog Park once a week Had our first hike Had our first beach trip
Jasper doesn't like it when I sit down at the sewing machine. He says "Hey, a walk would be better than that!"
And so we do.
Labels:
CA,
California,
dog,
green sewing,
Jasper,
Laurel Shimer,
pillow,
recycle,
remnents,
scraps,
sew,
sewing,
sewist
Sunday, November 1, 2015
Shabby Chic - Mobile Pocket Bag (Green Sewing, Embellishment)
| Embellished sewing scraps are green sewing at their best - and I also test washed the bag (inside out) to make sure I didn't loose any crystals. |
Goals
- Test to see how jeans type denim takes to embellishment with my Swarovski Elements tool and Swarovski hot fix crystals
- Use up a variety of Scraps
- Make something I'll get a lot of use out of - A multi-mobile device pocket bag
![]() |
| The little coin pocket from an old pair of jeans is the perfect size for my iPod |
Labels:
CA,
California,
denim,
Elements,
embellish,
embellishment,
green sewing,
recycle,
scrap,
scraps,
sew,
sewing,
sewist,
Swarovski
Monday, October 19, 2015
Western Winds Hanky (Green Sewing)
Scraps make some of my most useful sewing creations. Last time I posted bout my Western Winds princess-seamed sleeveless shirt. That shirt has been seeing a lot of use, perfect for our early fall warm temps. In the spirit of using up those scraps a.s.a.p. (and what could be more green?) I appliquéd a few other sraps to the remaining remnant of shirt fabric, hemmed the whole with a decorative stitch, and - presto change-o I had a useful new bandana. My kerchief has been seeing a lot of use as well. Very handy for moping my glistening brow when I'm walking or hiking. Also useful when there are no paper towels after washing my hands away from home!
Labels:
appliqué,
bandana,
CA,
California,
embellish,
fall,
green sewing,
handkerchief,
hiking,
scrap,
scraps,
seasonal,
sew,
sewing,
sewist
Monday, October 12, 2015
Western Winds Princess-Seamed Sleeveless Shirt- Terminado/Finished!
I talked about the process of altering the princess-seamed shirt, commercial pattern M6076, back in Fitting Western Winds . I used my sloper to work in conjunction with the pattern.Fitting + sewing made it such that I put off finishing the project. It means the project took a little longer. And yah know how 'tis.... when I don't sew every single day a project looses it's oomph. I wanted to get going with something else new when I had time to sew.
Good thing I had a trip to visit with my dear cousin in San Diego motivating me to finish my Western Winds shirt. I loved wearing it on the trip, and have worn it several times since. It's still summer-warm in my part of California. Aren't I glad this good warm weather basic didn't become a UFO, because it's been adding a lot to my just-doesn't-feel-like-fall-yet wardrobe.
BTW I simply used bias tape to finish off the inside of the armscye. Por que no? It works great and I had it already.
Fabric was from the "Japanese Cottons" section at Stone Mountain and Daughters in Berkley (in my materials inventory for about a year and a half) Horsey buttons were in my buttons inventory - scored them free somewhere. They give it that true western feel, don't you think?
Labels:
alter,
CA,
California,
commercial,
finished,
M6076,
McCalls,
pattern,
pattern work,
princess seam,
San Diego.,
sew,
sewing,
sewist,
sloper,
terminado
Western Winds - Terminado/Finished!
I talked about the process of altering the princess-seamed shirt, commercial pattern M6076, back in Fitting Western Winds . I used my sloper to work in conjunction with the pattern.Fitting + sewing made it such that I put off finishing the project. It means the project took a little longer. And yah know how 'tis.... when I don't sew every single day a project looses it's oomph. I wanted to get going with something else new when I had time to sew.
Good thing I had a trip to visit with my dear cousin in San Diego motivating me to finish my Western Winds shirt. I loved wearing it on the trip, and have worn it several times since. It's still summer-warm in my part of California. Aren't I glad this good warm weather basic didn't become a UFO, because it's been adding a lot to my just-doesn't-feel-like-fall-yet wardrobe.
BTW I simply used bias tape to finish off the inside of the armscye. Por que no? It works great and I had it already.
Fabric was from the "Japanese Cottons" section at Stone Mountain and Daughters in Berkley (in my materials inventory for about a year and a half) Horsey buttons were in my buttons inventory - scored them free somewhere. They give it that true western feel, don't you think?
Labels:
alter,
CA,
California,
commercial,
finished,
M6076,
McCalls,
pattern,
pattern work,
princess seam,
San Diego.,
sew,
sewing,
sewist,
sloper,
terminado
Saturday, October 3, 2015
Retro Threads - Trousers - Born to Dance - Blue Sky Sewing
Who says Ladies didn't wear trousers back in the 30's?
Not Miss Lucy James, a leading hoofer in "Born to Dance" (along with Fred Astaire) - that's for sure.
Wouldn't it be fun to sew up a trouser, shirt, and scarf outfit like this in dotted silk?
And how 'bout that offset button closure on the belt?
I love blue sky sewing, especially when it's retro.

Labels:
blue sky sewing,
Born to Dance,
CA,
California,
fred astaire,
Hollywood,
pants,
retro,
sew,
sewing,
sewist,
trousers
Saturday, September 26, 2015
Blue-Sky Sewing - Rose Embellished End of Summer Frock
Since I got my sloper done, I look at other woman's frocks with a new eye. I ran into Rebecca, on a toasty day while we were waiting for our devices to get fixed at the apple store, and she was kind enough to let me photo her in this great rose-embellished, gingham summer dress.Looks like maybe six tiers in that nice big rose. It starts above the natural waistline, and extends below the full hip.
This great gingham cotton frock also has bust darts.
I would try to recreate something like this by simply eliminating the front torso fisheye darts in my sloper, and maybe also grading the pattern out from beneath the bust darts?
Labels:
blue sky,
CA,
California,
cotton,
dress,
embellishment,
gingham,
one piece,
pattern work,
Rose,
season,
sew,
sewing,
sewist,
sloper,
summer
Saturday, September 19, 2015
More New York Garment District Trims - Embellishing my Newest Tapestry Cap
I posted previously about the denim cap that I took along on my trip to New York to both trim and finish with simple hand sewing. I bought the beads and Swarovski crystals for this project in the New York garment district as well as the trims for the denim cap.
I'd also taken along the tapestry cap I had made to replace the one I began embellishing on my trip to Vancouver last year - and then lost. I talked about that project in the Enchanted by Sewing Audio/Podcast Capping off Summer, that you can still listen to. I've already worn this cap (and it's matching mobile pocket bag) practically all summer. They both came in pretty hand on our trip to England and Scotland, and have worn well. I carried the mobile pocket bag all over New York too - perfect for my MTA transit card, keys and small amounts of cash I carried with me.
Hand embellishment is the perfect sewing project for me to take along when traveling, and it's such a good excuse for some low-key and less expensive shopping! I used things I bought right away, and they didn't take much room in my bag. Also, I don't always take the time to do this kind of work when sewing at home - but I felt quite inspired to finish this embellishment, begun on the trip once I got home. Unlike the pearled-denim cap that I finished, and wore, on the trip. I still had some beading to do on this tapestry cap when I got home. But a few days after my return, it was done.~ ~ ~
Read more about my big city experiences in New York - http://simpleromantic.blogspot.com/2015/09/new-york-field-trip-casual-art-friendly.html
Lucy Locket's Mobile Pocket Bag Holds my iPod, iPhone, a little money, a few cards and whatever other bits and pieces I need for walks, bike trips and travel. http://meencantacoser.blogspot.com/2015/06/lucky-lockets-mobile-device-pocket-bag.html
This Enchanted by Sewing podcast episode is all about how I make my casual caps. I have another on (dressier) hat making.
Caps Show - http://enchantedbysewing.blogspot.com/2014/08/ench-by-sew-023-capping-off-summer.html
Hats Show- http://enchantedbysewing.blogspot.com/2015/03/ench-by-sew-030-hats-off-to-downtown.html
Labels:
bead,
CA,
California,
cap,
fun travel project,
garment district,
hand sewing,
New York,
sew,
sewing,
sewist,
tapestry,
trim
Wednesday, September 16, 2015
Fitting Western Winds - Princess-Seamed Shirt M6076 (Journal/Sloper/Pattern Work)
Journaling - Learning to fit and work with my sloper.
I'm also learning to question, my sloper.
I'm starting with a basic princess-seamed shirt pattern - McCalls 6076.
Initially I'm working with the princess-seam in shoulder seam option (view A). (others in line drawing below)
Noted so far
- Learning to compare front or back pattern pieces to my sloper, I have to learn where to place them. Do I line up the base of underarm seam/armscye? If I start comparing at shoulder seam I can get thrown off because I often need to alter this area - except on some commercial patterns, when it's fine!
First time through with a test-garment (that's the one I'll actually wear, one step beyond my muslin) I'm making a sleeveless version. I'm taking careful note of where I
-a- I alter the underarm seam (armscye) to create a tighter fitting armhole
-b- Take the top of the armhole back somewhat, for this no-sleeve version.
Later I'll test the muslin with a muslin sleeve, where I'll test the pattern without both of these (a and b) alterations.
Another benefit to a sleeveless test garment is, I'm getting it out of a piece that is somewhat less than 2 yards. I will be piecing the under collar, and also the front facing. But I don't expect those piecing line to show.
Waistline and Princess Seam Alterations
Working on a very fitted look without overfitting
Would be better to add an extra seam allowance - 1 inch instead of 5/8- for all this playing around
Lots of trying on here! Did same front and back on all 4 princess seams
I made sure to safety pin the front closed matching up the button hole marks, so that I don't overfit. I want the shirt to button and need a certain amount of overlap for that.
- First I basted a 1/4 inch seam along the princess stitching line
- Then increased (still with a basting stitch) the princess line seam allowance to 7/8"
- Then I unabasted the second line of basting below the bust and graded back to the 7/8"
- Finally I took in/graded the waist with a kind of elongated half oval, about 3 and 1/2 inch above and below the waist. Challenging figuring out when to alter waist and when to alter princess seams - lots of safety pin basting helped with that
Altering Armscye/Armhole for Sleeveless Version
I took the shoulder seam back towards the neck for an improved sleeveless style
* Compared to my sloper, and graded in 1/2 inch at bottom of armhole/armscye on side seam for sleeveless. Then I graded back out to original side seam after, hummm.... about one to two inches? A french curve is handy for doing that. I admit, I eyeballed it. I kept the original full seam on the pattern, because I'll probably want it for the sleeved version. I also kept it on the muslin so I can reuse the muslin when testing a sleeved version.
* I also tested raising the side seam up for the sleeveless version (based on what I learned in French Pattern Drafting class going from moulage to sloper) , but it was too tight.

* For sleeveless, I'm raising outside shoulder (taking it back towards the neck line) for sleeveless style - 1 3/8" (11/8") without S.A. - so probably either 9/8 (1 and18) or 6/8 (3/4) " cut back/off - the first for 1/4" and second 5/8" S.A. I'll mark on the pattern what works for sleeveless - but keep the full original armscye on pattern for sleeved version test.
In addition to desirability of a sleeveless shirt for our late-running summer-in-fall weather, this helps me to focus on fitting aspects of the torso. The sleeve adds in a whole 'nother fit challenge, even though it means I have to make alterations when I go between sleeveless and sleeved. A good reason to journal!
Shoulder Seams
* I ended up adding 1/2" (better would have been more - because I only took a 1/4 "seam allowance (S.A.) - so next time add in 7/8") to the back
* I therefore took back 1/2" from the front because of alteration to back. Again because I only sewed the 1/4" S.A., next time through I will add back another 3/8 inch and sew a full 5/8" S.A.
* I've made this shoulder line adjustment many times, the reason I didn't catch it when comping my Master Pattern Trace (M.P.T.) to the sloper? For the back - I forgot that the S.A. is not included in the sloper pattern, as it is in the commercial pattern. (Often forget this). For the front, I don't know. The front of my sloper just looks too high. The No S.A. sloper comes out at the same time as the M.P.T.. So it seems like maybe I should make a tentative adjustment to my sloper front - dropping it by perhaps.... 3/8 or 1/2 inch. It's challenging thinking between with and without S.A. But this is something to think about math 'wise as I continue to work comparing my sloper to patterns I trace.
- I pin basted the muslin to make sure I had a basic fit, but I really didn't see the shoulder issues until I cut out and stitch -basted the test garment. In the future, maybe encourage myself to stitch-baste that muslin. I have a way of not seeing the pattern as real until I move past the muslin. It seems good enough, and I really want to see it as an actual garment. And with the pins in, I'm always in a hurry to get out of it!
I basted with a stitch length of 6 and starting out with 1/4" seams. Then I keep trying it on and increasing the S.A. up to 5/8" . Alternatively, I could have added a full 1" S. A. on the first pass, but I figured since the muslin was OK, I didn't need to.
Right now I'm happy with accurately placed shoulder seams - which gives a shirt a custom fitted look. I took in the 2 side seams more, but they are still a little loose. However, I haven't yet basted a deeper princess seam (4 actual seams). Once I check those, I'll know if I want to grade in - all or some of - the side seams to increase the fitted look.
![]() |
| M6076 - Three princess-seamed shirts |
I'm starting with a basic princess-seamed shirt pattern - McCalls 6076.
Initially I'm working with the princess-seam in shoulder seam option (view A). (others in line drawing below)
Noted so far
- Learning to compare front or back pattern pieces to my sloper, I have to learn where to place them. Do I line up the base of underarm seam/armscye? If I start comparing at shoulder seam I can get thrown off because I often need to alter this area - except on some commercial patterns, when it's fine!
-a- I alter the underarm seam (armscye) to create a tighter fitting armhole
-b- Take the top of the armhole back somewhat, for this no-sleeve version.
Later I'll test the muslin with a muslin sleeve, where I'll test the pattern without both of these (a and b) alterations.
Another benefit to a sleeveless test garment is, I'm getting it out of a piece that is somewhat less than 2 yards. I will be piecing the under collar, and also the front facing. But I don't expect those piecing line to show.
Waistline and Princess Seam Alterations
Working on a very fitted look without overfitting
Would be better to add an extra seam allowance - 1 inch instead of 5/8- for all this playing around
Lots of trying on here! Did same front and back on all 4 princess seams
I made sure to safety pin the front closed matching up the button hole marks, so that I don't overfit. I want the shirt to button and need a certain amount of overlap for that.
- Then increased (still with a basting stitch) the princess line seam allowance to 7/8"
- Then I unabasted the second line of basting below the bust and graded back to the 7/8"
- Finally I took in/graded the waist with a kind of elongated half oval, about 3 and 1/2 inch above and below the waist. Challenging figuring out when to alter waist and when to alter princess seams - lots of safety pin basting helped with that
Altering Armscye/Armhole for Sleeveless Version
I took the shoulder seam back towards the neck for an improved sleeveless style
* Compared to my sloper, and graded in 1/2 inch at bottom of armhole/armscye on side seam for sleeveless. Then I graded back out to original side seam after, hummm.... about one to two inches? A french curve is handy for doing that. I admit, I eyeballed it. I kept the original full seam on the pattern, because I'll probably want it for the sleeved version. I also kept it on the muslin so I can reuse the muslin when testing a sleeved version.
* I also tested raising the side seam up for the sleeveless version (based on what I learned in French Pattern Drafting class going from moulage to sloper) , but it was too tight.

* For sleeveless, I'm raising outside shoulder (taking it back towards the neck line) for sleeveless style - 1 3/8" (11/8") without S.A. - so probably either 9/8 (1 and18) or 6/8 (3/4) " cut back/off - the first for 1/4" and second 5/8" S.A. I'll mark on the pattern what works for sleeveless - but keep the full original armscye on pattern for sleeved version test.
In addition to desirability of a sleeveless shirt for our late-running summer-in-fall weather, this helps me to focus on fitting aspects of the torso. The sleeve adds in a whole 'nother fit challenge, even though it means I have to make alterations when I go between sleeveless and sleeved. A good reason to journal!
![]() |
| M6076 - Test Garment Fit In Progress |
Shoulder Seams
* I ended up adding 1/2" (better would have been more - because I only took a 1/4 "seam allowance (S.A.) - so next time add in 7/8") to the back
* I therefore took back 1/2" from the front because of alteration to back. Again because I only sewed the 1/4" S.A., next time through I will add back another 3/8 inch and sew a full 5/8" S.A.
* I've made this shoulder line adjustment many times, the reason I didn't catch it when comping my Master Pattern Trace (M.P.T.) to the sloper? For the back - I forgot that the S.A. is not included in the sloper pattern, as it is in the commercial pattern. (Often forget this). For the front, I don't know. The front of my sloper just looks too high. The No S.A. sloper comes out at the same time as the M.P.T.. So it seems like maybe I should make a tentative adjustment to my sloper front - dropping it by perhaps.... 3/8 or 1/2 inch. It's challenging thinking between with and without S.A. But this is something to think about math 'wise as I continue to work comparing my sloper to patterns I trace.
- I pin basted the muslin to make sure I had a basic fit, but I really didn't see the shoulder issues until I cut out and stitch -basted the test garment. In the future, maybe encourage myself to stitch-baste that muslin. I have a way of not seeing the pattern as real until I move past the muslin. It seems good enough, and I really want to see it as an actual garment. And with the pins in, I'm always in a hurry to get out of it!
I basted with a stitch length of 6 and starting out with 1/4" seams. Then I keep trying it on and increasing the S.A. up to 5/8" . Alternatively, I could have added a full 1" S. A. on the first pass, but I figured since the muslin was OK, I didn't need to.
Right now I'm happy with accurately placed shoulder seams - which gives a shirt a custom fitted look. I took in the 2 side seams more, but they are still a little loose. However, I haven't yet basted a deeper princess seam (4 actual seams). Once I check those, I'll know if I want to grade in - all or some of - the side seams to increase the fitted look.
~ ~ ~ Web Resources ~~~
An interesting related fitting post, that journals some of the challenges of fitting a basic princess-seamed pattern http://artisanssquare.com/sg/index.php?topic=16322.0
Labels:
CA,
California,
fit,
learn,
M6076,
pattern work,
princess seam,
sew,
sewing,
sewist,
shirt,
sloper,
test garment,
Western Winds,
work with
Saturday, September 12, 2015
New York Garment District Trims- Pearled Denim Cap
I was in New York for three weeks helping my daughter find, move and settle into her new apartment. The Upper East Side of Manhattan, where Rosalinda will be living while going to graduate school, is well situated for forays to the NYC garment district. You can bet I'll be looking for excuses to visit!

I focused mostly on visiting trim shops in this famed area. Trims are small and light to carry back. They're also something I could make use of while traveling. This pearled denim* cap - I bought the pearly beads and lace trim in the garment district- is one of two cap projects I purchased trims for in the garment district, and worked on during my trip. I was able to quickly cut it out and do some fast machine stitching before I left town, then did the embellishment and a little hand sewing to finish it off while I was there. I completed it early on, so I was able to make good use of it's sun protecting character during my visit to the Big Apple.
I'm considering adding another line or two of pearls....
~ ~ ~
Read more about my big city experiences in New York - http://simpleromantic.blogspot.com/2015/09/new-york-field-trip-casual-art-friendly.html
This Enchanted by Sewing podcast episode is all about how I make my casual caps. I have another on (dressier) hat making.
Caps Show - http://enchantedbysewing.blogspot.com/2014/08/ench-by-sew-023-capping-off-summer.html
Hats Show- http://enchantedbysewing.blogspot.com/2015/03/ench-by-sew-030-hats-off-to-downtown.html
* The denim was a remnant from the Summer Essentials shorts I blogged about last month
Labels:
CA,
California,
cap,
denim,
embellish,
embellishment,
garment district,
New York,
pearl,
podcast,
sew,
sewing,
sewist,
travel,
trim
Thursday, September 10, 2015
Ench By Sew-36: Fiona, the Irish Laurel Dress
Dress creation brings out the romantic in me. When I looked ahead to my summer sewing, I thought if I could sew only one garment for the season, it would be a dress. Fiona, the Irish Laurel dress, satisfied my yearning to design and sew the perfect summer frock.
Hey let’s listen to the show! To do that you can either download the ‘cast from iTunes - Click on this link to iTunes ,
*OR* listen directly on the web, by clicking on this link
* * *
This dress was a very satisfying project for my arty romantic style.
In between sewing summer essentials - shorts and tees - I worked off and on to determine what design lines spoke to me about summer, mock up a miniature sloper pattern to test my ideas, draft a pattern from my sloper, and then finally to sew up Fiona, while summer was still on!
Hey let’s listen to the show! To do that you can either download the ‘cast from iTunes - Click on this link to iTunes ,
*OR* listen directly on the web, by clicking on this link
* * *
This dress was a very satisfying project for my arty romantic style.
In between sewing summer essentials - shorts and tees - I worked off and on to determine what design lines spoke to me about summer, mock up a miniature sloper pattern to test my ideas, draft a pattern from my sloper, and then finally to sew up Fiona, while summer was still on!
* Pensamientos Primeros - Thinking through my idea for this summer dress
- Part 1 - Planning Fiona
- Part 2 - Farewell to Summer Romancing Fiona, the Irish Laurel Dress
- Part 1 - Planning Fiona
- Part 2 - Farewell to Summer Romancing Fiona, the Irish Laurel Dress
*Technicos - Pattern Drafting and Kissing Zipper using a Prick Stitch
*Pensamientos Finales - Fiona's Design Lines have roots in my own history
Finians Rainbow was a modern American fairy tale. It expressed late 1960's dreams for racial harmony and folks coming together. Fred Astaire (Finian McLonigan) and Petula Clark(his daughter Sharon) added in the romance of America seen, and idealized, fresh from Irish eyes. The story of Finian's determination to plant himself a crop of Irish gold, intertwined with romance of countryside and a new happpily-ever-after love for Sharon draws me in as well today as it did when I was a kid who'd only recently arrived in a new place myself. Any wonder that the movie's costumes inspire my pattern work and sewing today?
Visit Me Encanta Coster/Enchanted by Sewing - my regular sewing blog for other summer sewing I enjoyed along the way... in between time spent bringing Fiona to life
Labels:
CA,
California,
design,
designer,
dress,
Finnian's Rainbow,
Fiona,
History,
Irish,
Irish Laurel,
linen,
movie,
pattern work,
Romance,
sew,
sewing,
sewist,
sloper,
song,
summer
Subscribe to:
Posts (Atom)